Can you cut 1 Tonne of carbon pollution out of your life?
Take the challengeNo knitting or crochet required, just some sewing and braiding. It's not the quickest project - it'll probably take you a couple days to make one, but the results are well worth it, I think!
YOU WILL NEED:
- sewing needles (sharps OR heavy duty will work best)
- white thread (I chose polyester for added strength)
- a thimble
- plastic bags of all types - grocery bags are easiest, but you can mix and match.

WHAT TO DO:
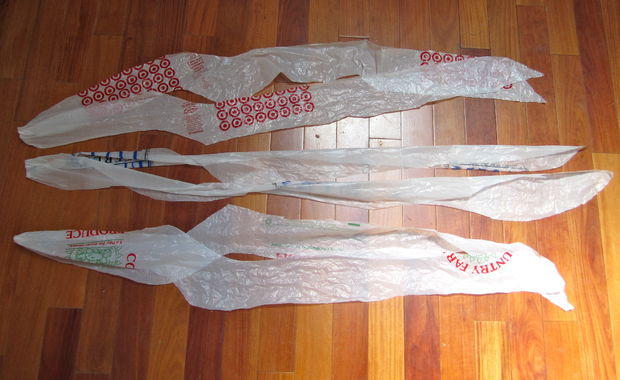
1. Cut bags into strips
It is very important to cut these strips pretty wide. For most normal sized bags, it is possible to get three continuous strips about 4 inches wide.
Lay out a plastic bag, and fold in the sides. Snip off the very top/handles and the very bottom, then open the bag to its full width.
Turn the bag so a side seam is facing you, and cut up and to the right in a sweeping motion until you get at least four inches in, and then begin cutting in a straight line. When you get near the side seam, slip a hand in the bag and turn it so that the side seam is flat and you can start on the second strip.
Cut up and to the right again, mirroring the first time you did it, and then cut straight until you reach a point where you have one closed strip left. You're going to make another diagonal cut to the right, this time cutting to the very edge of the bag.
So essentially, just keep cutting towards the right and mirroring the original diagonal cut.
You will need to do this to three bags to start your braid, though I suggest doing this whole process as you were a one person factory line - flatten all the bags you have, cut off the tops and bottoms, and then cut them all into strips, hanging the strips somewhere they won't get too tangled. Then begin your braiding.
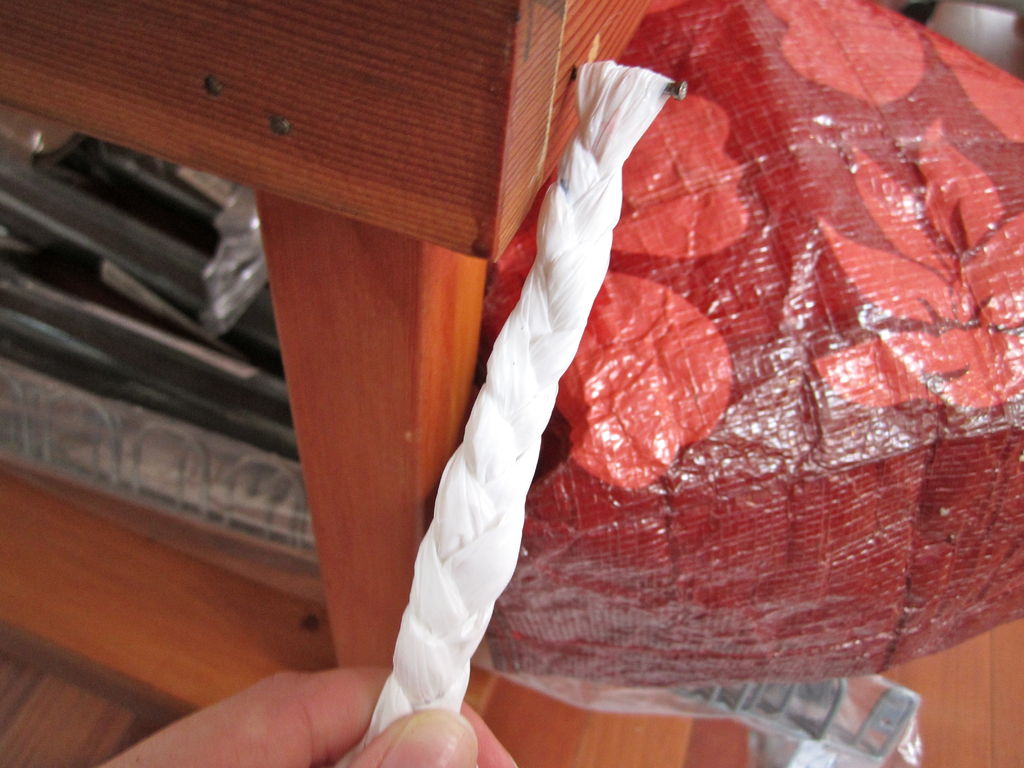
2. Braid the strips
The strip from each bag will be doubled over, and the two parts will count as one part of the braid. You will have six strands, but each will have a mate.
It is easiest to secure the looped ends of your strips over something small and sturdy, like a nail. I happened to have one sticking out of my desk. I assume you could also tape the ends to a table with decent results.
Once your strips are looped over the nail, make sure they're divided properly into their pairs and get braiding.
It's important to not braid too loose or too tight - too tight will make you lose all the wonderful texture and the braid will become quite small, and if your braid is too loose you'll have problems sewing it into a basket later as the foundation will be pretty floppy.
3. Some tips on braiding
Process tons of bags at a time by knotting new strips to the ends of the initial braid - no sewing required except for the very beginning and end of the braid. This does require more patience and a bigger work area, but goes very quick once you get the hang of it.
See more tips here on Instructables.
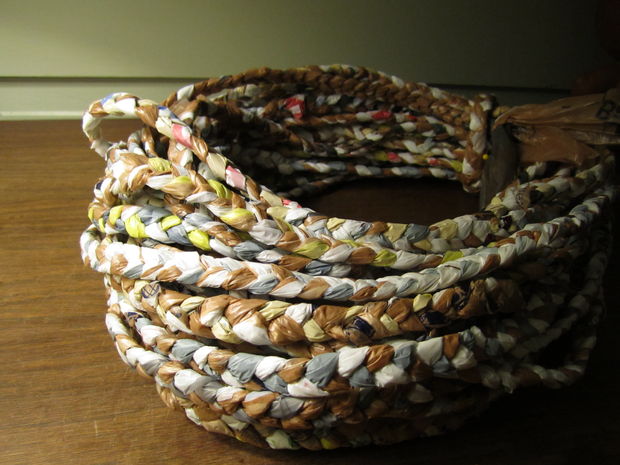
4. Start creating the basket
Coil the rope tightly, skinny side up, until you reach a base size you're happy with. Secure this with a pin or another sewing needle. Now, pick the uglier side of the round - it'll be side you sew through to secure it.
You're going sew to four separate lines into the bottom - one vertically, one horizontally, and two diagonals going through the center.
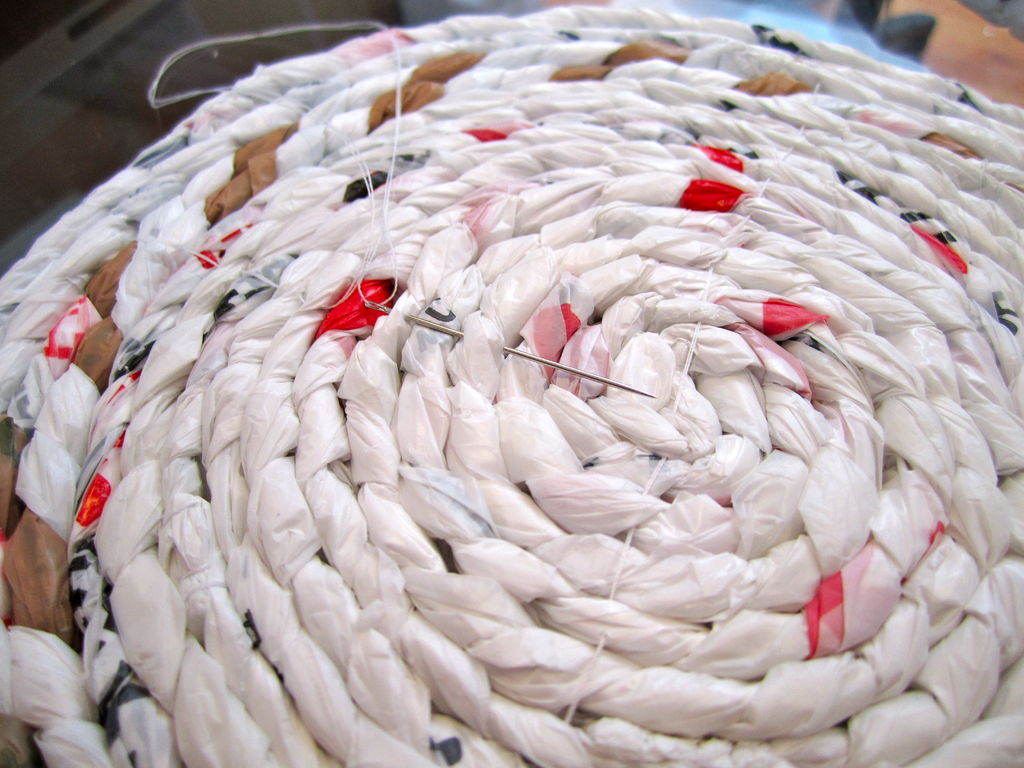
Here's the protocol for each line:
- thread your needle with doubled thread, and make sure the knot at the end is quite large - otherwise it could pull through.
- anchor the thread at one edge by pushing through the first round, and then going back over and through it again.
- push your needle through every other round, pulling/keeping the thread taut as you go.
- once you reach the other side, make sure the thread is nice and taut, and that your base is good and flat, and then anchor the thread in the outside round and knot a few times.
Once you've finished all your lines, bend the base a bit to see how stable it is. There will be shifting, but none of the rounds should fall totally out of place. Larger bases might require additional lines... so keep that in mind!
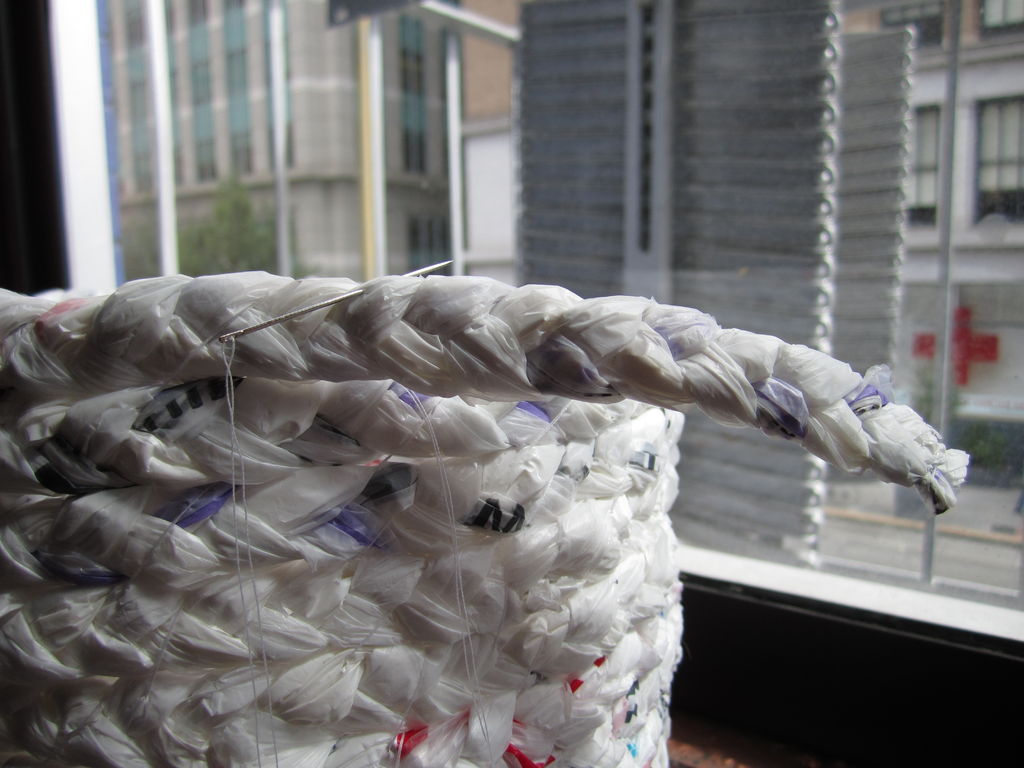
5. Building up the sides
Get yourself another loooooooooooong length of doubled over thread and knot it several times.
Grab the tail of the braid that you pinned into the base, and bring it up diagonally to form the bottom row of the basket. Push your needle down through the base as shown in the first picture, and then bring it over the braid and back down through the base to secure the bottom row. Do this every 1-2 inches, keeping the thread diagonal and tight and the braids upright and straight, until you're left with 3-4 inches of thread.
Then, anchor the two layers of braids together and knot on the inside of the basket as shown in the last picture.
You'll keep repeating this process until you get close to the end of the braid, or until you reach a size you like.
READ THIS NEXT: Everything you need to know about recycling
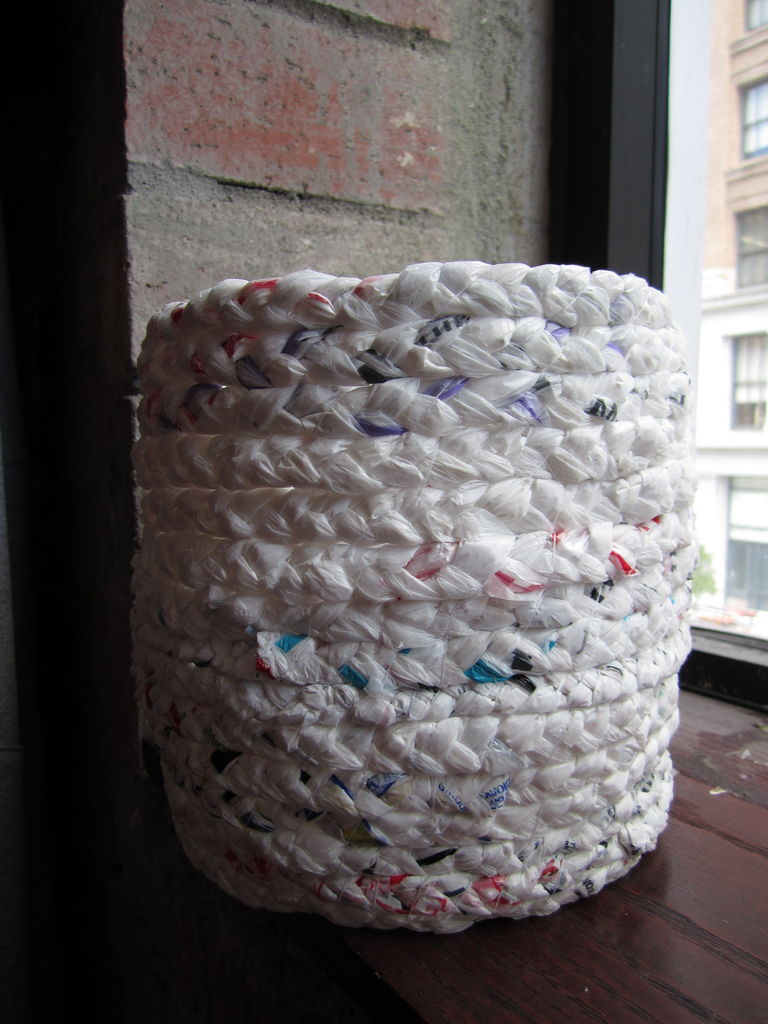
6. Finishing the basket
Keep doing those diagonal up and over stitches until you come to the end of the braid.
Then, tuck the very end of the braid behind the top row and stitch into place as shown. You can trim or fold over the end of the braid to make it look neater if you like.
Final tips:
- a thimble will probably be your best friend through this project. Pushing the needle through the plastic bags can sometimes get tricky.
- if you don't have a thimble, try to vary the fingers you use to push/pull the needle through the braids.
- if you're not excited about the plastic bags, I'm sure braided t-shirts or other fabric would work just as well. I'm thinking about trying that next.
- make sure that you're always pulling the thread tight when building the basket - it'll keep the braids in the right position and keep them from shifting as you add extra layers.
- depending on how tight/loose you pull the braids as you sew, you can create curves in your basket.
This blog has been adapted from an Instructable that was originally posted by Jessyratfink and is being shared under a Creative Commons ShareAlike license.
READ THIS NEXT: The Art Of Upcycling: Turning Junk Into Something Useful