Can you cut 1 Tonne of carbon pollution out of your life?
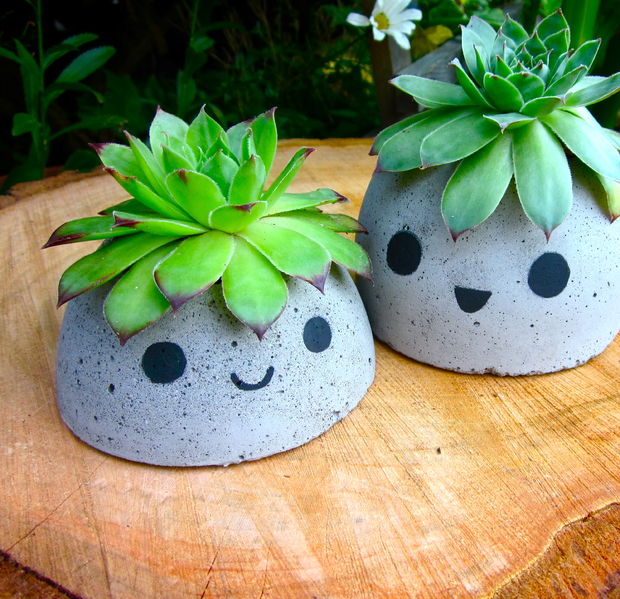
Take the challengeThese cute concrete planters are an adorable addition to any home or garden! The molds are made of recyclable materials and concrete mix is very inexpensive to buy. You can switch up the plants in these planters to give these little guys a fresh new 'do.
Step 1: Gather Your Supplies
To make the mold, you will need:
- Plastic pop bottle
- Marker
- Scissors and utility knife
- Tape
- Drinking straw
- Cooking spray or petroleum jelly (as a mold release)
To mix and cast concrete, you will need:
- Concrete mix
- Safety gear: gloves, mask, safety glasses
- Container for mixing
- Water
- Something to mix with (eg. garden trowel)
To add the finishing touches, you will need:
- Concrete paint
- Paintbrush
- Coconut fiber or potting soil
- Plants
Step 2: Cut Pieces For Your Mold
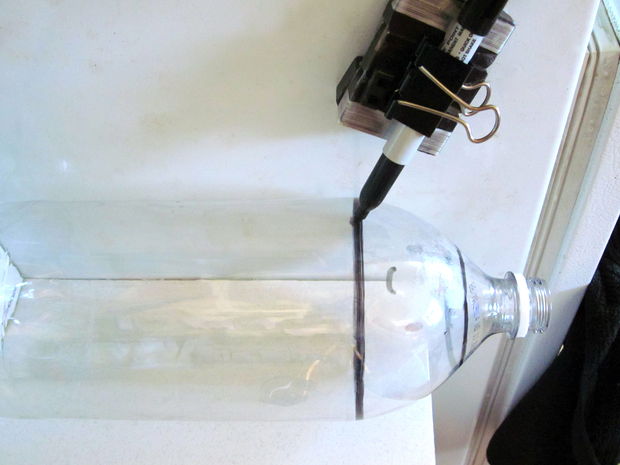
You will want to use the upper portion of the plastic pop bottle. Mark where you want your cutting lines to be on your bottle. (Tip for drawing perfectly straight lines: Use a metal clip to hold on to your marker and stick the clip to a magnet on your refrigerator. Then place your bottle so that it is touching the fridge and position the marker so that it is in contact with the bottle. Rotate the bottle all the way around so that you have drawn a line all the way around the bottle.)
To cut the bottle, I first used a utility knife to make a puncture and then I continued with scissors. Once the dome part is cut out, you can work on the inner cavity. You will need to cut a strip from the bottle that is about a half an inch shallower than the dome part
Step 3: Assemble Your Mold
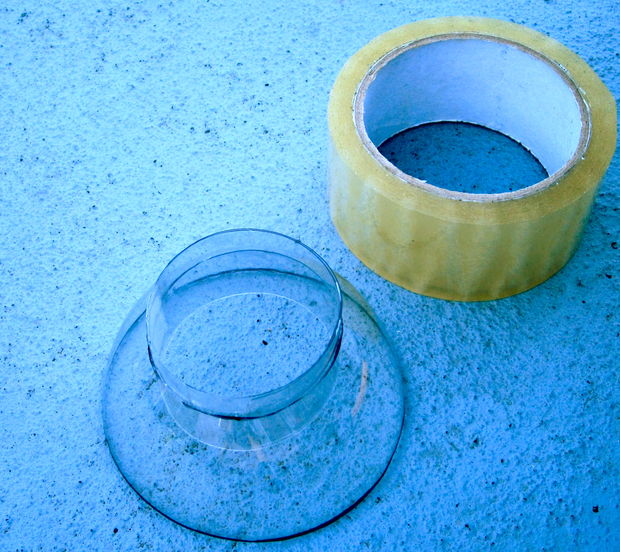
Roll up the strip of cut plastic and place it in the opening at the top of the dome. Let the strip unroll so that it forms a cylinder the same size as the opening. Tape it in place.
Use tape to close the inner tube cylinder at the end that is closest to the large end of the dome. Make a hole in the tape and stick a straw through to make a drain hole.
Coat the mold with cooking spray or petroleum jelly to help the concrete release.
Step 4: Mix & Cast Concrete
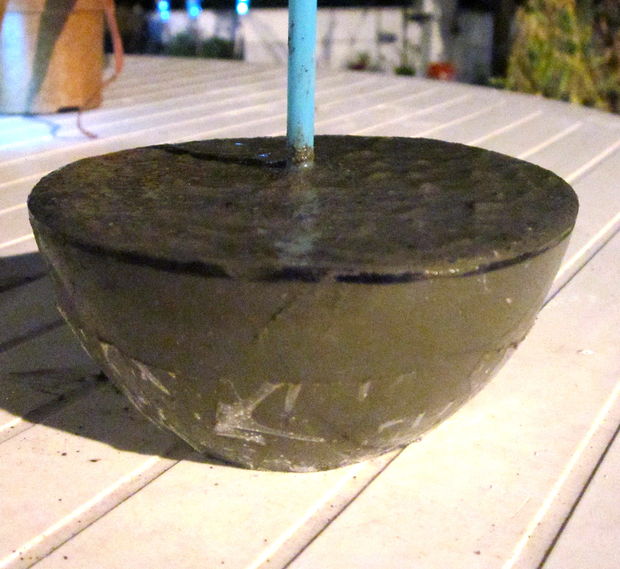
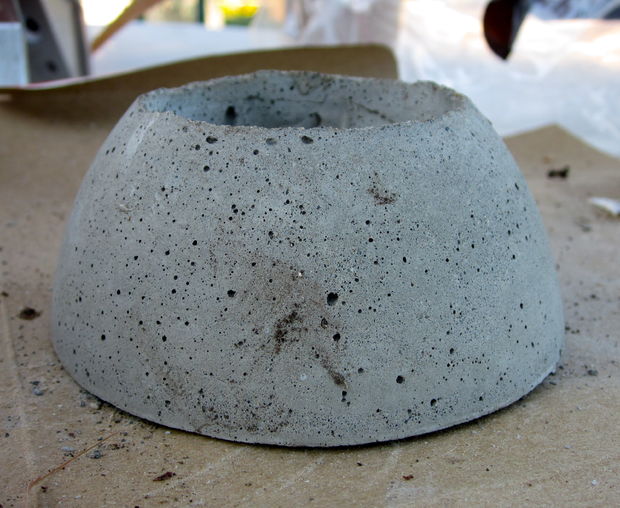
I used about 4 pounds of mix for 3 planters and used the amount of water suggested by the instructions. I mixed it in a plastic bucket with a garden trowel. I added the mix to the mold, a little bit at a time, while tapping the mold to try to prevent air pockets. Remember to wear your gloves, mask, and safety glasses!
I cured the concrete for the amount of time the instructions suggested for warmer weather. During this time, I tried to keep the concrete moist. After I removed the concrete from the molds, I soaked the planters in water and vinegar overnight to try and neutralize the concrete.
The bottom of my planters were not completely level, so I sanded them down using a bit of sand and a plank of wood.
Step 5: Finish
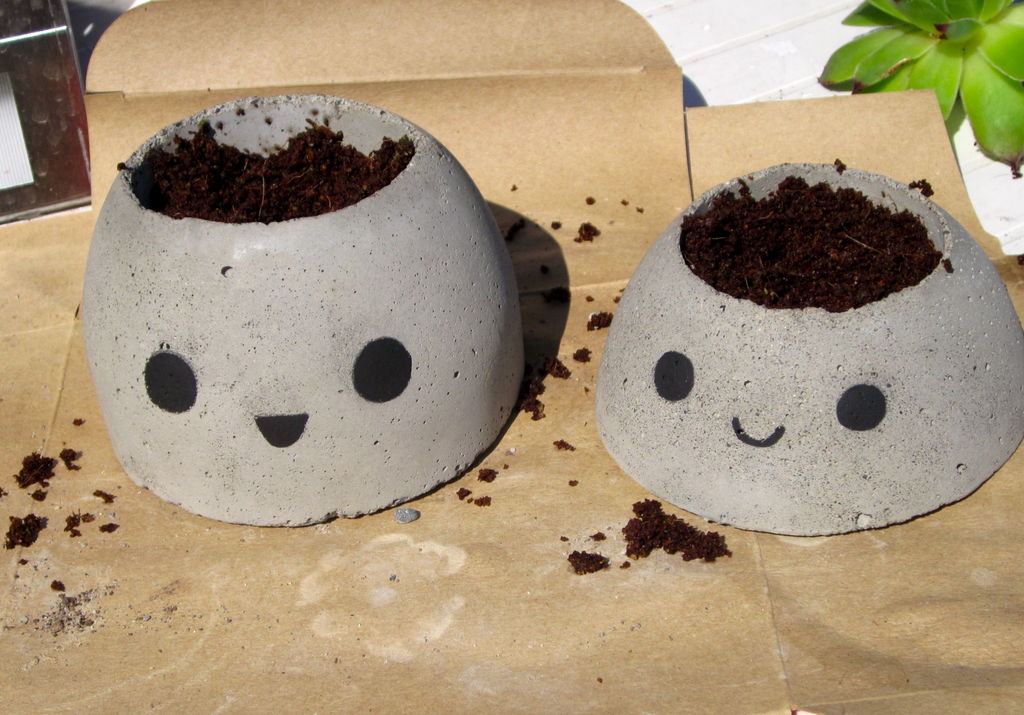
Paint on a face with paint suitable paint for concrete.
Fill the planter with coconut fiber or potting soil and add a plant hairdo.
Done!
Did you have a go at this project? Let us know how you went in the comments below!
This blog is adapted from an Instructables post by smori
READ THIS NEXT: [How to] Make a basket out of plastic bags