Can you cut 1 Tonne of carbon pollution out of your life?
Take the challengeMaking your own kombucha at home is much easier than you would think! If you're wanting to get into homebrewing or fermenting, this is a fun first project to try out.
Once you've either acquired or grown a SCOBY, all you really need is some bottles to get started! I've included a basic recipe for brewing your own kombucha. Once you master the basic kombucha recipe, you can start playing around with different tea and sugar types and even flavourings!
It's important to note that kombucha brewing is all about trial and error. You are going to be your own guinea pig! Homemade kombucha is all about tasting and testing and trying new stuff. You'll have to taste it pretty often to determine if it's sour/sweet enough for you.
I used The Kitchn's guide to making kombucha as my guide on this kombucha making journey - I highly suggest you read it as well! Lots of good information there.
Step 1: Ingredients + tools

Depending on how much kombucha you'd like to make, the amounts will differ. I've included ingredients and tools for both 1/2 gallon and 1 gallon amounts of kombucha. I used the 1/2 gallon amounts for my first batch, and the gallon measurements for the second.
1/2 gallon of kombucha ingredients + tools:
- 6 cups water
- 1 cup liquid from last batch of kombucha OR scoby creation
- 1/2 cup sugar (plain white sugar or raw sugar)
- 4 tea bags (green, black, white - nothing herbal or flavored)
- 64 oz/2 quart glass jar suitable for canning
1 gallon of kombucha ingredients + tools:
- 13 cups water
- 2 cups liquid from last batch of kombucha OR scoby creation
- 1 cup sugar (plain white sugar or raw sugar)
- 8 tea bags (green, black, white - nothing herbal or flavored)
- 1 gallon glass jar, like this one
Keep in mind that people have been able to make kombucha with herbal and flavoured teas, but it involves more trial and error. Some herbal and flavoured teas have been shown to kill or weaken the scoby, so I really recommend sticking with basic unflavoured teas at first!
tools:
- large pot for making tea base
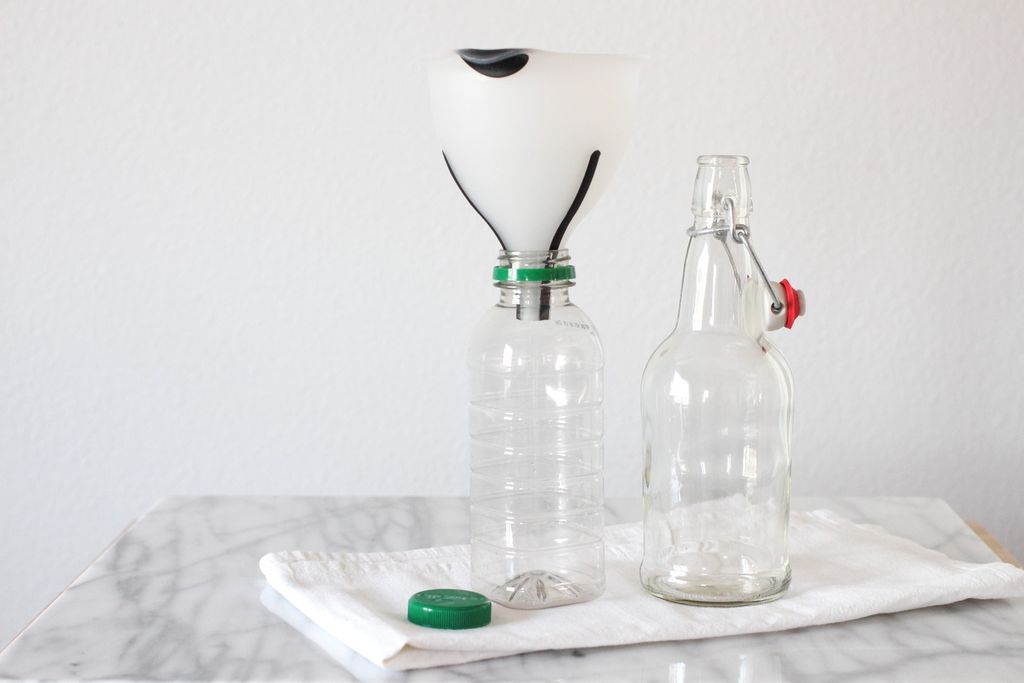
- several 12-16 oz glass bottles (I'm using these)
- one 12-16 oz plastic bottle
- measuring cups
- coffee filters
- hair tie or rubber band
- funnels
- thermometer for checking tea temperature
Step 2: Buy or grow a SCOBY
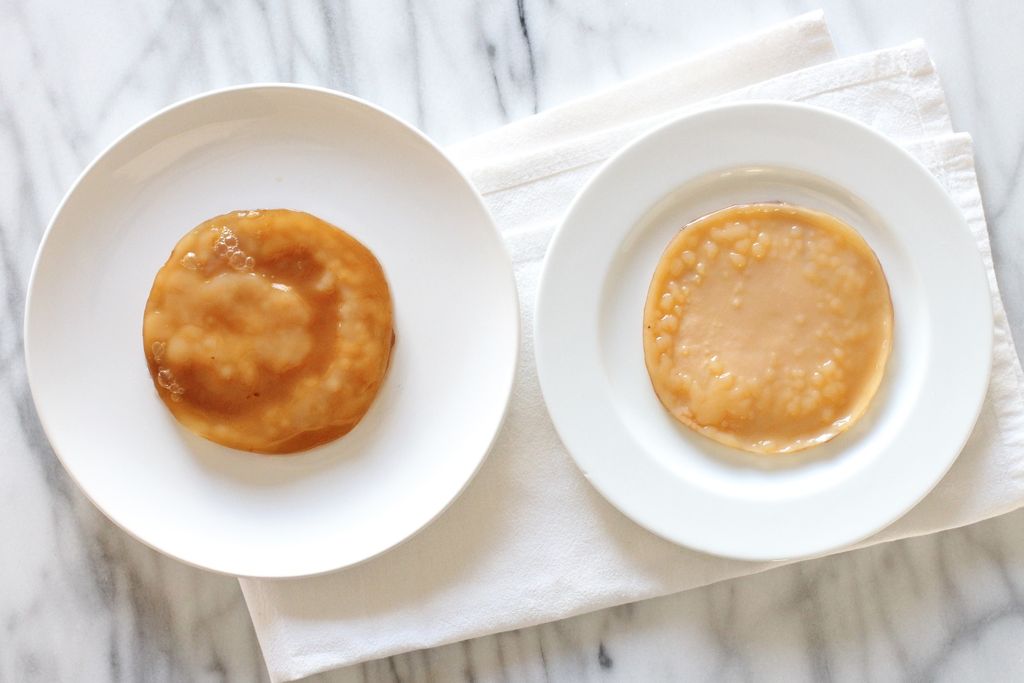
This is step one, really! There are loads of places to buy them online, or you may even know someone that brews their own kombucha that may have extra scobys laying around! (Once you start, you'll have loads of them!)
The route that I went was growing my own. You can see the whole instructable over growing your own scoby here. This route is insanely cheap - you just need some tea, sugar, water and store bought unpasteurized and unflavored kombucha.
It takes less than a month to do this, and it was really interesting watching it grow.
Plus, you can show it to all your friends while screaming "I MADE THIS" so that's pretty awesome.
Step 3: Get all the other kombucha-making supplies and clean them
As I've stated before, you'll need 1 gallon glass jar (128 oz) or a 2 quart canning jar (64 oz), depending on how much kombucha you want to make!
You will also need bottles for bottling it at the end - anything in the 12-16 oz range works great! I used glass swing top bottles and one plastic bottle I reused. The plastic bottle is important, because it will be your carbonation expert. You can't figure out how carbonated the kombucha is by squeezing the glass bottles, but you'll know from the plastic one. Try to make sure the plastic and glass bottles are about the same size.
Clean everything you'll be using for the kombucha really well - measuring cups, pans, spoons, bottles, jars, etc. I throw the bottles and jars in my dishwasher on the sanitize setting, but you can also just wash them really well with warm water.
Step 4: Prepare your tea base
If you followed along with my scoby growing guide, you're already familiar with this! To start this whole process, we need to make some sweet tea and then cool it down to room temperature.
If you're making a half gallon, use 6 cups of water, 1/2 cup sugar and 4 tea bags
If you're making a gallon, use 13 cups of water, 1 cup sugar and 8 tea bags.
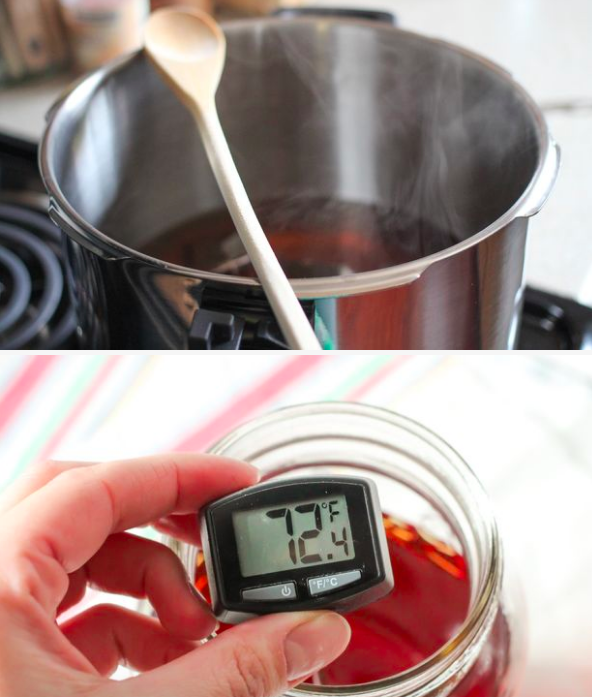
Bring the water to a boil in a clean pot. Pour in the sugar and stir to dissolve. Take it off the heat and add in the tea bags. We're going to leave the tea bags in until the sweet tea reaches room temperature. (This seems like a bad idea, but let me tell you, when I haven't let the tea steep the whole time, the kombucha ends up ridiculously sweet.)
After an hour or so, I tend to pour the sweet tea into the container I'm using to make the kombucha and pop it in the fridge to cool down a little faster. Check every 45 minutes or so with a instant read thermometer if you do this - you don't want to chill it past room temperature because then you have to wait longer. ;)
Once the tea has come down somewhere between 68-75 F / 20-23 C it's cool enough to move on to the next step!
Step 5: Add in store bought kombucha or some from your last batch
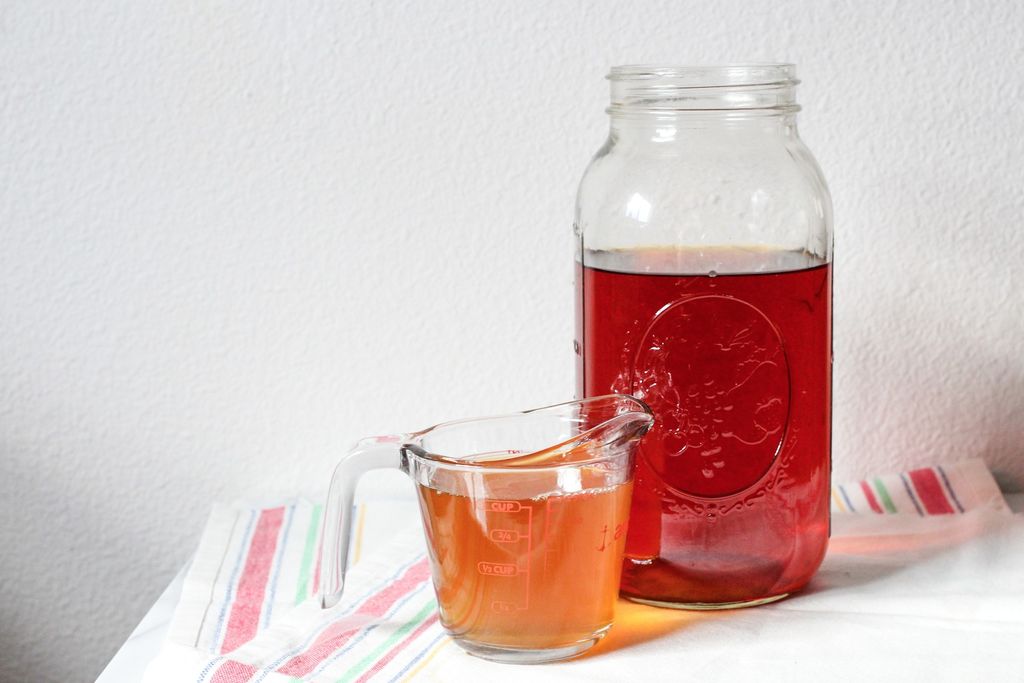
If your sweet tea hasn't already been poured into your fermenting jar, do that now! Since the sweet tea is nice and cool now, we're going to add some kombucha.
If this is your first time making kombucha, there are a few ways to do this:
- If you grew your own scoby, use some of the kombucha the scoby was grown in. This is more like kombucha vinegar than kombucha, but will work fine!
- If you bought a scoby, you can use unflavored and unpasteurized kombucha from the store.
- If you've already got a batch of kombucha going, use some of that in the next batch.
If you're making a 1/2 gallon, add one cup of kombucha to your sweet tea mix.
If you're making a gallon, add two cups of kombucha to your sweet tea mix.
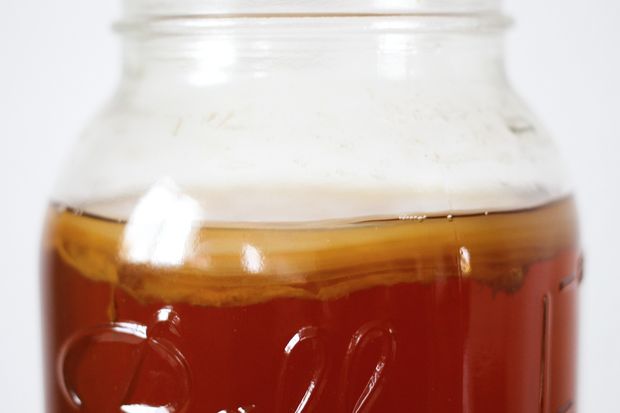
Step 6: Add in your scoby + what to expect from the scoby

Wash your hands really well and grab the scoby out of the liquid it's in - in these photos, mine was still in the initial kombucha I grew it in.
Place the scoby gently into the new sweet tea. Cover the jar with a coffee filter and secure with a rubberband. Place the jar in a dark warm place.
Important to know: that scoby is about to do whatever the hell it wants.
Don't be alarmed if your scoby sinks right to bottom or floats sideways or any other weird positions. Don't be worried that it's too small, either! A scoby will grow to fit the mouth of whatever container you're using. If it doesn't come up to the top, it will still be working to make a new scoby to cover the top. Sometimes the two scobys (the old one and the new one that forms!) will fuse, and sometimes they'll stay apart.
For this particular batch of kombucha, my scoby floated sideways at the bottom for half of the time, and a new one grew on top. Then one day the original scoby started floating slowly up to the top and fused to the new scoby.
The current batch I'm brewing, a new scoby is forming, and the old one is fusing to the bottom of the new one at an angle. (See the third photo) So you know, scobys be like ¯\_(ツ)_/¯
Just leave them alone and let them police themselves, it'll turn out okay. Promise.
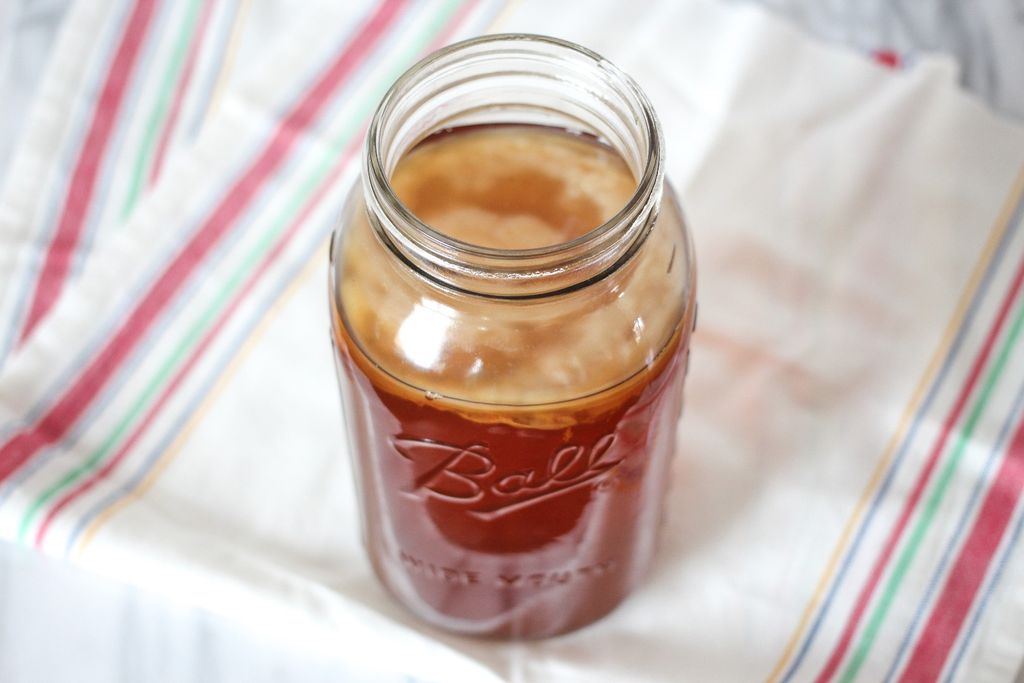
Step 7: Fermentation + testing your kombucha
Remember to cover the mouth of the jar with a coffee filter to keep it safe during fermenting! You don't want bugs or anything else to get it, but it still needs to breathe. :)
Now comes the fermentation phase! During this time, you can pretty much let the jar hang out undisturbed for 7 days. Thought I admit I check on it nearly every day because I love watching the scoby do its thing.
After 7 days of fermentation, you'll want to start tasting the kombucha. Just pour a little out and taste it!
Keep tasting it every day until it's the right balance of sweet and tart for you. That's it!
Keep in mind that if your house is pretty chilly (like mine because I am too cheap to turn on the heat yet) it will take a little longer to get to where you want it. If you really don't like sweet, you'll have to wait a while, too. The longer the kombucha ferments, the more sour it will get.
On the opposite side - if you live in a really warm place, you may want to start tasting a little earlier.
By the way, you can absolutely just drink the kombucha now! But I prefer to carbonate it.
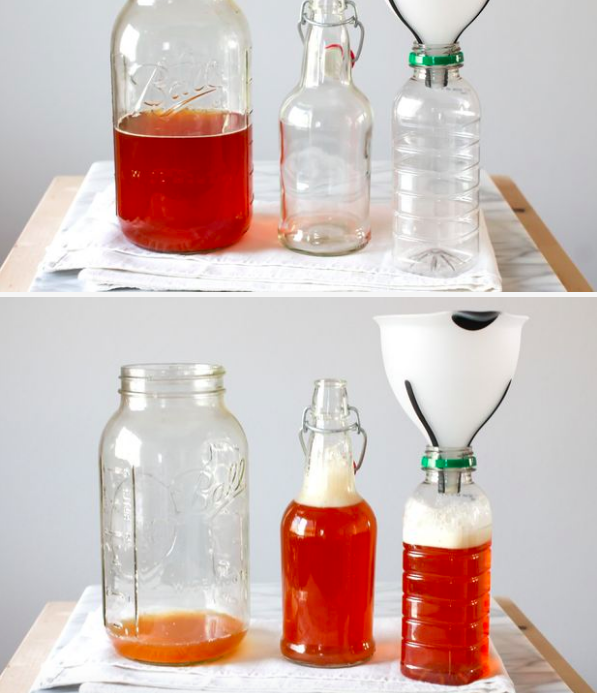
Step 8: Bottling and carbonating your kombucha
You can also flavour your kombucha before you bottle it, but since I haven't given that a go yet I don't feel qualified to tell you how. ;) Check out The Kitchn article for more info!
Once the kombucha tastes good to you, you'll want to transfer it to bottles.
Before you do this, make sure you have another batch of sweet tea cooled and ready to go, because you don't want to leave your scoby high and dry. Wash the fermentation jar between bottling the kombucha in it and refilling it with the new sweet tea. Also, remember to save 1 or 2 cups of the finished kombucha to add to the next batch. :)
Transfer the kombucha to clean bottles using a funnel. Remember to use at least one plastic one, so you can check the carbonation levels. Try to fill them pretty full - you don't want a lot of open space in there because it will hinder the carbonation. If you see lots of bubbles, that's good!
Once the kombucha is in bottles, seal them up and set them somewhere out of direct sunlight at room temperature. It will take a few days for the carbonation to get going.
CAUTION: Don't bottle and carbonate your kombucha when you're super busy and not at home to check. These bottles can explode if you forget about them, and no one wants a house that smells like kombucha.
I check the plastic bottle every single day during this time, normally twice a day. When the plastic bottle is rock hard, there's enough carbonation! Move all of the bottles from room temperature into the fridge.
Step 9: Storing your kombucha

You should drink what you brew within a month for best taste! So far ours have barely lasted until I'm bottling the next batch. :)
Homemade kombucha tastes quite different from store bought kombucha so far and I love it!
Step 10: What to do with your scoby when you're not brewing
If you are going to be away home for a while, or you just want to want to take a break from kombucha, it's completely fine to leave the scoby hanging out in sweet tea.
It will continue to grow and ferment the tea and you can pick up with it where you left off!
You may just have a monster scoby when you come back. :D
Scobys grow in layers, so you can even just peel some of it off.
Happy fermenting!
This guide originally appeared on Instructables by jessyratfink
Try this next: Homemade citrus peel cleaning spray