Can you cut 1 Tonne of carbon pollution out of your life?
Take the challengeSprouting grains and beans on your own is cheap and easy to do! They can be eaten on their own raw, or cooked and added to other dishes. You can even make flour from sprouted grains!
In this DIY by Instructables, you can learn how to sprout grains and beans on your own.
Keep in mind that there are certain beans that are toxic eaten raw, so always do your research before eating them raw. You can sprout and then cook them, however!
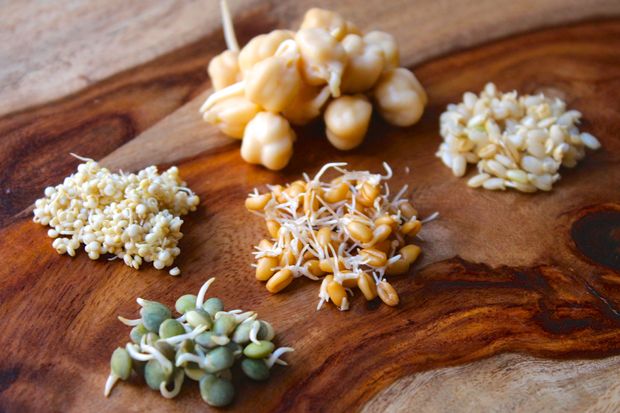
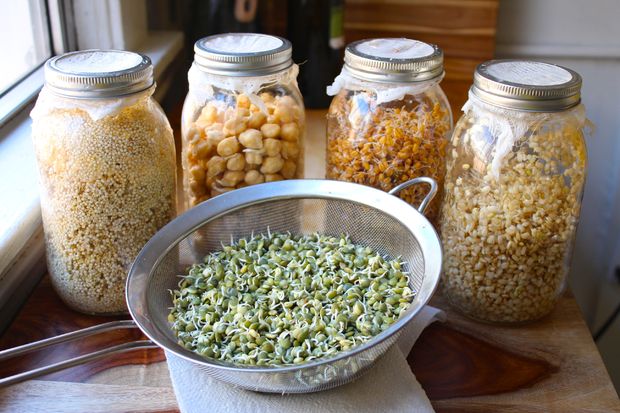
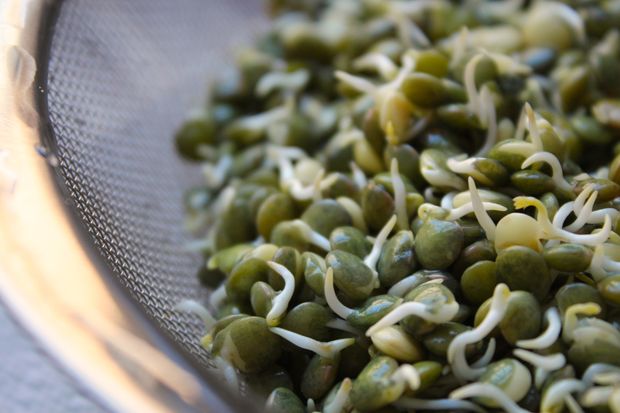
From left to right: quinoa, French lentils, brown rice, wheat berries, chickpeas
What you'll need
Equipment:
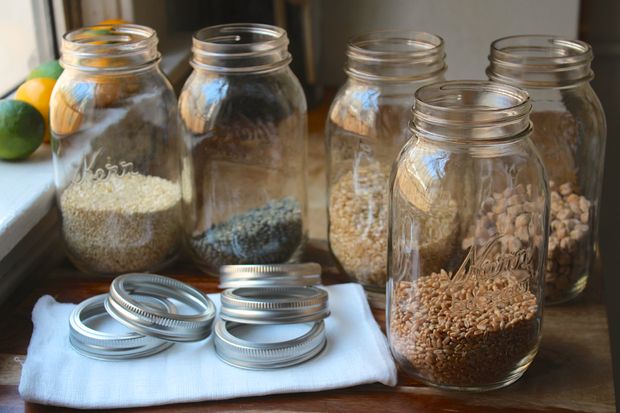
- 1L (quart sized) mason jars
- cheesecloth
Beans/Legumes to sprout and eat raw:
- whole lentils (DIY uses french green lentils)
- mung
- red bean (Adzuki)
- chickpeas
- green peas
Grains to sprout:
- wheat berries
- quinoa
- brown rice
- barley
Method
1. Soak your grains/beans
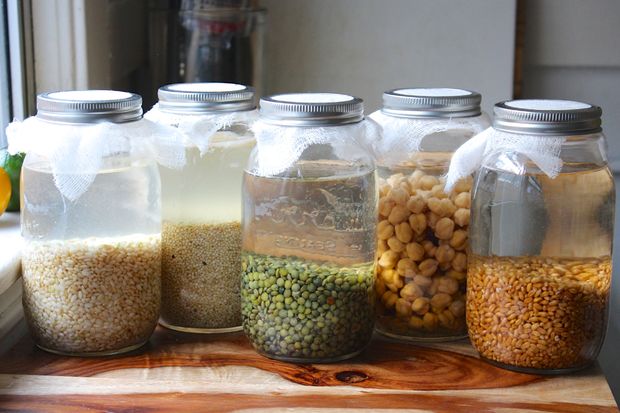
Keep in mind that the grains/beans will swell when soaked, so make sure you never fill the jars more than 1/3 of the way full.
You'll want to rinse the grains/beans and pluck out any rocks or odd colored pieces. Then pour them into jars and cover with cool water almost to the top.
Cover with the cheesecloth and seal with the lid ring and let them soak at room temperature for 6-8 hours. Do this out of direct sunlight.
I always lean more towards 8 hours, because that way I can go to sleep or head to work and let them soak while I'm doing something else.
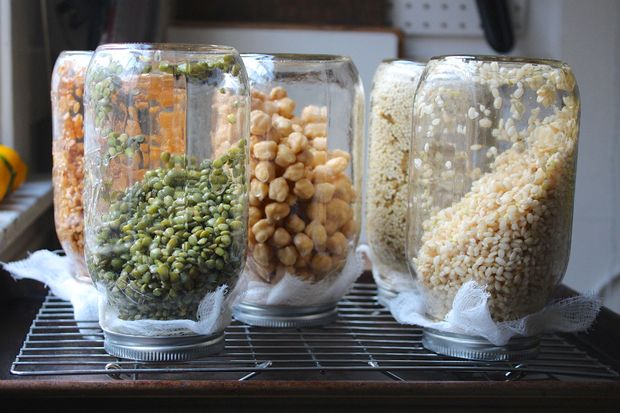
2. Pour out soaking water and rinse grains/beans well
A tip is to set them over a baking sheet on a rack so that they can continue draining.
For smaller grains like quinoa, you'll want to drain them really really well - otherwise they can get quite stinky! Holding the jars at a 45 degree angle lets them drain a little better.
After the initial rinsing, let them sit upside down on the rack (or on a dish rack!) unless you're rinsing them. You'll want to rinse them 3-4 times a day and set them back to drain until they begin to sprout.
Most beans and grains will be ready within 48 hours, though some can take 4-5 days - Keep them rinsed and well drained during this time or the sprouts can go bad.
In most cases, you can stop sprouting them as soon as you see a little tail, anywhere from 1/8 - 1/2 inch. Brown rice takes a while longer, however - and the leafy green sprouts can do with another day in sunlight so they grow tiny shoots.
If you let the sprouting process go too long, you can alter the flavor in a huge way, and often not for the better. The length of time that you let them sprout will be something you figure out with a little trial and error.
3. Storing your Sprouts
To store your sprouts, first rinse them well in a sieve or colander and let them sit for a bit to remove most of the water. Then store them in a small container and cover with a beeswax cover your can DIY yourself - pop a dry paper towel in there to leech out some of the moisture.
Store them in the fridge and use them within 3-4 days.[DIY originally from Instructables]
Read this next: Vegan Mexican rice and black bean salad recipe
We're in a climate emergency and it's going to take all of us to get out of it. That's why 1 Million Women is building a global community of women committed to fighting climate change with our daily actions. To join the (free) movement just click the button below!